Firstly, what is tempering chocolate you ask? Well, this is simply the art of reheating
and cooling chocolate carefully so that the liquid form can be used for dipping or covering
and then once set, harden with a smooth glossy finish. It should also have a clean break
when you bite into it. Untempered chocolate, on the other hand, can be dull and crumbly.
While there are many uses for tempered chocolate, creating moulds and covering sweet
treats (like truffles) are most commonly known.
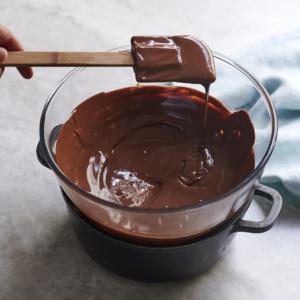
To get started, you’ll need to get your double boiler ready. Don’t stress – you simply need a pot, a bowl and water, easy enough! Place a tight-fitting glass or metal bowl over a pot of simmering water, make sure the water in the pot doesn’t touch the bottom of the bowl or it will burn the chocolate. Now, let’s get started…
How to temper chocolate at home
Step 1:
Melt ⅔ of the chocolate you need over a double boiler (see tip below).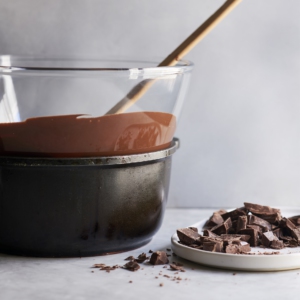
Step 2:
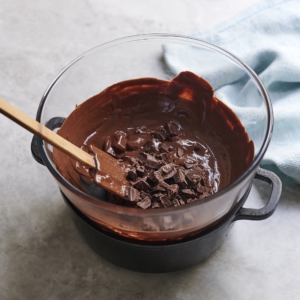
Remove bowl from heat and stir in remaining chocolate. Stir until all the chocolate is melted. Using a spatula, scoop melted chocolate up in the air and allow it to drip off. Repeat for a minute or two until thickened (the change in temperature helps to align the chocolate’s make up, creating a smooth texture).
Step 3:
Dip or mould as needed and allow to cool at room temperature.
Know your chocolate
Although we are all familiar with the different types of chocolate – dark, milk and white –
there’s more to it than that. You’ll also notice cocoa percentages on familiar brands of dark
chocolate.
The percentage of cocoa in chocolate refers to how much of the chocolate is
made from pure cocoa beans. Remember that 90% isn’t necessarily better quality than 70%;
it simply uses more cocoa beans and is, therefore, more bitter and less creamy in taste.
White chocolate, on the other hand, doesn’t contain any cocoa beans and is made of cocoa
butter which is a by-product of cocoa beans.
Melting or tempering chocolate at home can be a daunting task. But there is no need to be
at all. Firstly, what is tempering chocolate you ask? Well, this is simply the art of reheating
and cooling chocolate carefully so that the liquid form can be used for dipping or covering
and then once set, harden with a smooth glossy finish. It should also have a clean break
when you bite into it. Untempered chocolate, on the other hand, can be dull and crumbly.
While there are many uses for tempered chocolate, creating moulds and covering sweet
treats (like truffles) are most commonly known.
How to fix grainy melted chocolate
If your melted chocolate has gone clumpy or grainy while melting, it has overheated. This
means that the bowl over the double boiler had heated up too much causing the chocolate
to seize.
However, do not fear! This is relatively easy to fix. Simply add something cold to decrease the temperature and put in some elbow grease. A splash of cold milk or cream works well, simply add and whisk vigorously until smooth.
If this still does not fix the problem, add another splash of cold milk or cream and blitz together with a stick blender. This still might not be very stable, but at least the chocolate will stay smooth long enough to
set. Next time, remember to stir your chocolate more regularly and remove from the heat source at shorter intervals.
Now that you’re equipped to melt chocolate perfectly, get some berries or biscuits to dip and start practising today!

